Monday, December 15, 2008

Pelotzels

Pronounced "peh-LO-tzles." These babies are divine. My friend Judy emailed the recipe to me - apparently they're popular at Bunco. I almost made myself sick on them on many an occasion.

pecan halves
Rolos
waffle pretzles (they're about 1 1/2 inch square)

  1. Preheat oven to 350 degrees.
  2. Cover a cookie sheet with foil.
  3. Spread preztles out on cookie sheet.
  4. Top pretzles with Rolos.
  5. Cook Rolo-covered pretzles for 4 minutes - THAT'S IT - just enough to barely melt and soften up the Rolos.
  6. Carefully top each Rolo with one pecan half. Smush it down so it looks fancy-pants.
  7. It takes a while for the chocolate to re-solidify. Putting it in the fridge may hurry up the process.

Thursday, December 11, 2008

Cinnamon Rolls


Again, mandatory for a snowy morning.

1 recipe yeast rolls
1/2 stick butter
2 Tablespons sugar
2 Tablespoons ground cinnamon
1/2-3/4 cup chopped pecans (optional)
1 Tablespoon butter
2 Tablespoons milk
1 teaspoon vanilla
1-2 cups powdered sugar, depending on your taste of consistency

  1. Preheat oven to 375 degrees.
  2. Melt 1/2 stick butter.
  3. Mix sugar and cinnamon together.
  4. Roll out half of dough to almost 1/4 to 1/8 inch thick. Make a rough rectangle.
  5. Pour 1/2 of the butter butter on dough and smooth all over.
  6. Sprinkle 1/2 of the cinnamon and sugar mixture over butter.
  7. Sprinkle 1/2 of the nuts over cinnamon and sugar.
  8. Roll up dough lengthwise and seal edge with water.
  9. Cut into 1-1 and 1/2 inch thickness.
  10. Turn rolls up and set on ungreased cookie sheet, about 1-2 inches apart.
  11. Repeat with remainder of dough, butter, cinnamon sugar, and nuts.
  12. Bake for 10-15 minutes, or until brown.

For icing:

  1. Melt 1 Tablespoon butter in a deep microwave safe bowl (I use a 2 cup measuring cup).
  2. Stir in 2 Tablespoons milk and 1 tesapoon vanilla.
  3. Stir in powdered sugar until desired consistency is achieved. Thinner makes a glaze, thicker makes an icing.

Makes about 2 dozen.

Cha-Cha's Yeast Rolls

Every time it snows, I have to make cinnamon rolls. It's tradition. Even if it hints at snowing, the cinnamon rolls make an appearance. Snow, Christmas, overnight company, and sometimes Thanksgiving are almost mandatory for homemade cinnamon rolls.

Yes, you could say making cinnamon rolls is my version of doing the snow dance. (Beats doing the rain dance naked. That's just cold.)

But to make cinnamon rolls, you need a basic starter of yeast rolls.

This is by far my favorite yeast roll recipe. Yeah, it's old school, so it's a little more wiley than other yeast rolls, but once you get the hang of it, they come out tasting damn good every time. Even if you don't have the hang of it, they're pretty good. I remember when my grandmother, Charlie Faye Nixon Flynn, also known as Cha-Cha would make these.

One of the tricks is not to knead it too much: when cutting out the dough, you need to try to get as many round circles in a rolled-out flat of dough as possible. Which means start on one side and work your way to the other, cutting out rolls as you go. I would DELIGHT in cutting out the first roll out of the direct middle of the dough flat, meaning that it would have to be reworked more often, thus slightly more tough and certainly less efficient.

I've grown up to have the same perverse delight in driving in the exit or walking in the out door too.

These are great rolls, but they also make awesome little sandwiches for a buffet or parties or just leftover turkey/roast/ham/whatever in front of the TV.

2 cups milk (or one cup milk, one cup buttermilk)
1 rounded teaspoon salt
1/2 cup sugar
1/2 cup shortening
2 packages yeast, dissolved in 1/4 cup cool water
5 scant cups flour (just shake the measuring cup side to side to even out the top)
1 teaspoon baking powder
1/2 teaspoon baking soda
butter

1. Heat shortening, milk, salt, and sugar until it melts.
2. Pour into a large stainless steel bowl and let it cool 'till very warm, but not hot. If you can hold your hands against the side without thinking "ouch" or cussing, it's probably ready.
3. Add yeast to water; let it soften, and stir into very warm milk mixture.
4. Stir in well 3 cups flour and cover - this makes a big mess.
5. Put cloth over mess and let it rise until double.
6. Work down with spoon or hands.
7. Add remaining 2 cups flour (give or take 1/2 cup), baking powder, and soda and mix well.
8. Cover tightly; will keep in refrigerator for 7 days.
9. Roll out dough as needed, cut in rounds, fold round in half, top with melted butter, and bake until brown (about 10 minutes).

Sunday, December 7, 2008

Chiffon Pumpkin Pie

How to have the perfect, non-stress Thanksgiving? Have everybody else cook for you. It wasn't really planned: Mom had a friend make the dressing, then she made the spinach madeline, one of my dear clients gave us the best smoked turkey I've ever put in my mouth, and Judy made the pecan pie. All that was left for me was this holiday staple.

It's a very old recipe - probably one of my oldest. My grandmother says it was my grandfather's grandmother's recipe... So that was my great-great grandmother. And to think - that was before electric mixers, so the eggs were beaten with a hand-crank egg beater! I know people who don't even know what those are.

The first time Mom ever went to my Dad's parents' house was for Thanksgiving. My grandmother held up the whole meal because she couldn't find this recipe. At first, Mom thought Grandmama was crazy.... Then she tried it and understood. It's a light, fluffy pie, so you can still eat it after a huge meal.

This recipe makes 2 pies. Don't worry - they won't go to waste.

2 baked pie shells, completely cooled
3 egg yolks, slightly beaten
1 cup sugar, split into half-cups
1 1/2 cups canned pumpkin (1 - 15 or 16 ounce can. Be sure to get just pumpkin, not pumpkin pie filling.)
1/2 cup milk
1/2 teaspoon cinnamon
1/2 teaspoon salt
1/2 teaspoon ginger
1/2 teaspoon nutmeg
1 Tablespoon gelatin (1 envelope Knox)
3 egg whites, stiffly beaten
1 pint Cool Whip or whipped cream

  1. Combine egg yolks, 1/2 cup sugar, pumpkin, milk and spices in a saucepan.
  2. Cook until thick. BE CAREFUL to have fully combined ingredients so the eggs don't scramble. This shouldn't take long - about 5 minutes to get it hot through.
  3. Soak gelatin in water for 5 minutes.
  4. Add pumpkin mixture, mix well, and set aside to let it cool.
  5. Once at room temperature, add rest of sugar and gently fold in stiffly beaten egg whites.
  6. Pour in pie shells and top with whipped cream or Cool Whip.

Thursday, November 20, 2008

Birthday Cake

Mike's and my somewhat belated birthday cake. I made it this morning, all from scratch and using John and Joy Lynn's eggs. Notice the sweetpeas are GA Tech colors.


Mike's Favorite Pork Tenderloin

I made a discovery tonight: citrus juice makes meat more tender. It's probably something the whole world has known forever, but I didn't. And I learned all by myself.


I had some extra drink garinshes left over from the party last weekend. And it was time for us to have a roasted pork tenderloin. So here's what I did:

1 lime, cut into pieces
1 orange, cut into pieces
1/4 - 1/2 cup (depending on taste) soy sauce
1/2 - 1/2 cup (depending on taste) teriyaki sauce
2 teaspoons ground ginger
2 teaspoons ground nutmeg
2 teaspoons kosher salt
2 teaspoons paprika
1 clove garlic, minced
  1. The night before, in a Pyrex dish, squirt all but a few pieces each of lime and orange juice onto the tenderloin.
  2. Leave everything in the dish, even the lime and orange peels.
  3. Add 1/2 of the soy and teriyaki sauces to each side, flip, and add the rest to the other side.
  4. Rub the dry ingredients into each side of the meat.
  5. Cover and refrigerator overnight.
  6. Set the loin out on the counter about 1 hour before cooking to get the chill off the meat.
  7. Put the loin fat-side-up in a roasting pan (I think the Pyrex dish would do, but thanks to Mom, we have a beautiful new roasting pan I was dying to use), pile the orange and lime peel pieces on top, and put into the cold oven.
  8. Set the oven to 350 degrees and cook for about 75 minutes, or until the interior meat temperature reaches 160-170 degrees.
  9. Pull meat out of the oven and let it rest at least 5 minutes before slicing.

This dish also makes your kitchen smell GREAT. I mean, Williams Sonoma, Fresh Market great. And you can't beat it for casual, fancy-pants presentation. Eat the roasted citrus if you want to, but we just kept it around for garnish and flavor and because it smells good.


Monday, November 17, 2008

Crock Pot Candy

My good friend Dave at Fondren gave us this recipe. You could sit in front of the TV and do some major damage on these babies. Before you even get started, it might be a good idea to buy an extra roll of wax paper - you will be suprised how many pieces it makes.

Also, you might want to pick up some of those little paper candy cups from Michael's before you get started. That way you'll have an idea of how big you'd like the final product to be, in case you want to "fancy" them up.

1(16oz.)jar salted peanuts
1(16oz.)jar unsalted peanuts
1 bag semi-sweet chocolate chips( 12oz. milk chocolate chips)
1 bar german sweet chocolate, broken in pieces
2(1 and 1/2-lb.)pkgs white almond bark, broken in pieces

  1. Layer all ingredients IN ORDER LISTED in a large slow cooker.
  2. Cook on low for 3 hours. DO NOT OPEN THE LID .
  3. After the 3hrs., stir. The almond bark will appear unmelted, even after 3 hrs. After stirring, it blends in well.
  4. Do not cut the heat off while you drop the candy by teaspoons onto wax paper.
  5. Makes about 150-160 pieces of candy

The dropping process takes a long time. Turn on the radio and prepare to boogie down. Also, it takes about 30 minutes for the candy to set up on the wax paper, so it's not possible to pick up the wax paper on its own: the candy will all slide to the middle and make a big mess. I learned to do it this way:

  1. Line the entire kitchen table with towels (so the heat from the candy won't melt wax from the paper onto the table and mess up the finish).
  2. Turn a large cookie sheet upside down on the counter next to the crock pot.
  3. Put a sheet of wax paper on the underside (the top, now that it's turned over) of the cookie sheet.
  4. Drop the candy onto the paper.
  5. Then take the cookie sheet with the paper over to the kitchen table.
  6. Slowly and carefully slide the paper from the sheet onto the table.

This way you free up counter space and have enough room to hold all the candy pieces.

Whenever I make this recipe, I can't help but think how nice it would be for a party such as a shower or wedding reception. You would be the most popular and loved person at work if you brought these and put them on the conference table.

Malibu Italian Surfer / Peacock Paradise


Next time we have a party, this drink must be in the pitcher!

1 ounce coconut rum
1/2 ounce amaretto
1 splash cranberry juice
1 splash pineapple juice
Ice cubes

Build over ice in a highball glass.

But you know I'll have to spice it up. The pitcher version will have pineapple chunks and maraschino cherries in it. And I might try some tonic water. Blue curacao will definitely be added.

And the name will be Peacock Paradise.


Photo courtesy of Malibu Vacation Rentals.

Gorilla Bread

It's a cold, cold, clear morning. The sky has ranged from Easter egg purple to an aquamarine blue, and the thermometer says it's 37 degrees outside. My nose is numbing up as I sit here on the couch, and I'm encouraging Dante to curl up closer to my side while wondering if I'm brave enough to start the gas logs (I grew up with old-school wood fires.... all the technology kind of scares me).

This is one of my favorite recipes, especially if I'm going to visit someone overnight or if I'm having overnight company. The first time I made it, the recipe turned out great, but since then I've rather lost my mojo: the biscuits don't seem to get done. The culprit might have been my old oven at the old house. It became squirrelley toward the end of our stay there, and I haven't tried the recipe again since we moved. But since Mike's parents are coming in a couple of weeks for Thanksgiving, I figure I might have to try again.

Recipe courtesy Paula Deen
Show:
Paula's Home Cooking
Episode: Bed and Breakfast with Jimmy Carter

1/2 cup granulated sugar
3 teaspoons cinnamon
1/2 cup (1 stick) butter
1 cup packed brown sugar
1 (8-ounce) package cream cheese
2 (12-ounce) cans refrigerated biscuits (10 count)
1 1/2 cups coarsely chopped walnuts (I use pecans, of course.)

  1. Preheat the oven to 350 degrees F.
  2. Spray a bundt pan with nonstick cooking spray.
  3. Mix the granulated sugar and cinnamon.
  4. In a saucepan, melt the butter and brown sugar over low heat, stirring well; set aside.
  5. Cut the cream cheese into 20 equal cubes.
  6. Press the biscuits out with your fingers and sprinkle each with 1/2 teaspoon of cinnamon sugar.
  7. Place a cube of cream cheese in the center of each biscuit, wrapping and sealing the dough around the cream cheese.
  8. Sprinkle 1/2 cup of the nuts into the bottom of the bundt pan.
  9. Place half of the prepared biscuits in the pan.
  10. Sprinkle with cinnamon sugar, pour half of the melted butter mixture over the biscuits, and sprinkle on 1/2 cup of nuts.
  11. Layer the remaining biscuits on top, sprinkle with the remaining cinnamon sugar, pour the remaining butter mixture over the biscuits, and sprinkle with the remaining 1/2 cup of nuts.
  12. Bake for 30 minutes.
  13. Remove from the oven and cool for 5 minutes.
  14. Place a plate on top and invert.

It helps to freeze the cream cheese for a couple of hours before cutting it: makes the stuff more manageable. And sprinkling sugar and cinnamon near the sink helps keep the mess down.

After it has cooked, if the biscuits aren't done, just spread them out on a cookie sheet and finish cooking them until done. At least that's what I did. The sugary syrup around them might burn on the sheet, so once they're done, just take up the biscuit and scrape the burnt stuff down the disposal. Nobody will ever know. Trust me.

Sunday, November 16, 2008

Oeufs

Our friends John and Joy Lynne brought us these, freshly hand-picked and farm-raised. I am enamored.

Shoyu Chicken or Spare Ribs

This is one of my favorite easy recipes: the flavor is incredible, and it makes your house smell good. The only hard part is being able to get in the kitchen by 4 in the afternoon to have it ready when Mike arrives home. Jessica C. told me last night about cooking chicken in the crock pot, and I don't see any reason why a crock pot wouldn't work in this recipe.

I actually had thought about doing this in a crock pot once before, but I had read that slow cookers are only good for dark meat. What the heck - just be sure to cover the meat with water or other liquid (so it won't dry out) and only include the meat of the chicken in the pot; remove the skin and bones first. You might end up with chicken hash, but hey, it will be damn good hash.

And Mike loves the name, Shoyu (pronounced "Show-you"): he usually pats me on the butt and says, "Show me what?"

2 lbs chicken or spare ribs
½ cup shoyu (soy sauce)
¼ cup sugar (brown preferred)
3-4 cloves garlic, crushed
crushed or grated ginger
2 Tablespoons vinegar or wine

  1. Combine the above ingredients and pour over the chicken or ribs.
  2. Place in a Pyrex dish, covered, in 325 degree oven for 2 hours.
  3. Turn meat over after 45 minutes.

Pretzel or Graham Cracker Crust

I'm not sure where I found this recipe. It's not one I made up on my own, but I've seen it in several different places. The idea for pretzel crumbs was mine, though I'm sure others have come up with it before me. I figured, hey, I like salty AND sweet. I bet this would be great at the bottom of a pie. And it remains my favorite crust for key lime pie.

1 cup graham cracker crumbs or pretzel crumbs (a food processor really helps with this!)
3 tablespoons white sugar
5 tablespoons butter, melted

  1. Preheat oven to 325 degrees F (165 degrees C).
  2. Mix graham cracker crumbs with sugar and melted butter.
  3. Press into 9 inch pie plate and bake for 5 minutes.
  4. Remove from oven and let cool.

Ugly Dip


Another hit of last night's party was some homemade salsa. I remember the first time I ever enjoyed this dish: Mike and I were dating, and he took me to a friend's dinner party. Instructed to bring a dip, he made this recipe, and I distinctly remember riding in the truck after he picked me up, carrying it in a hot pink plastic bowl in my lap. We still have that bowl.

Since then, Mike has made the dip several times, but since it's a time-consuming labor of love, and since he wanted it for last night's party, this was my first time to make it. The recipe comes from Sugar Beach: A Cookbook by The Junior Service League Fort Walton Beach, Florida. Mike's mom Judy had inscribed it "Merry Christmas, 1984," and the front page has "Granddoll's" (Mike's mother's mother) written in pencil. I never met Granddoll, but I can't help but think we would enjoy each other.

"Excellent, but UGLY!" (I don't agree with this statement at all - I think it's actually a very nice looking salsa. It just needs a good stir every now and then.)

4 large tomatoes, peeled and finely chopped
4 green onions, minced
1 (4 ounce) can jalapenos, drained and finely chopped
1 (4 1/2 ounce) can black olives, finely chopped
3 Tablespoons olive oil
1 teaspoon garlic salt
2 teaspoons vinegar
Salt and pepper to taste


  1. Mix all ingredients and chill overnight.

  2. Serve with tortilla chips.

  3. Serves 10.

Lou Baughman

You know I can't follow a recipe to save my life. I had some fresh cilantro out in the yard, and as the weather is about to kill it off, I harvested as much as I dared, chopped it up, and dumped it in the dip. To me, you can't get too much cilantro in salsa. For more green, I also added a small can of diced roasted green chilies. Since we were serving more than 10, I added a few tomatoes and green onions, used a large can of black olives, and added jalapenos and the jalapeno juice to taste. I love the spicy! And lime juice is a must.

To chop olives, tomatoes, and jalapenos, I used the small chopping plate on the Vegetable Chop and Measure from Williams-Sonoma. The olives and jalapenos, I just dumped in the chopper and closed the lid. The tomatoes took the longest: I peeled them, then sliced them in half. I then sliced thinly those halves to result in a cubing effect when I put them in the Chop & Measure.

Crab Casserole

Last night Mike and I had a party at the new house. So much to celebrate, so many good friends with whom to share it! The theme was cookout and cocktails; we had grilled burgers and hot dogs, chips, dips, boiled peanuts, trash, brownies (courtesy of John's wife Joy Lynne), and chocolate chip cookies. But the real star of the show was Mike's bar. I think the favored drink of the night was a Malibu Italian Surfer: coconut rum, amaretto, pineapple juice, and cranberry juice. I might have to start keeping pineapple juice in the house for just such an occasion.

Jessica, this one's for you. I hope it's the recipe you wanted!

This recipe came in what probably turned out to be my most-used wedding gift. A dear friend of mine, Nash, made a recipe binder for me entitled The Peacock Personal Cookbook. It has page protectors, and yes, I have spilled an entire stick of melted butter on the pages and marveled at how easily it all wiped off. The recipes that Nash included (since its reception, I have added lots of pages, recipes, and memories) are a compilation of those of her best friend, Ann, who lives in Palo Alto, California. Per Nash, these recipes, "[she] wasn't able to ruin, no matter how hard [she] tried... All will really work and are easy to master."

This is elegant and easy. A good tossed salad and some high class French bread and a dry white wine helps make this a meal to remember.

1 cup milk
2 eggs, well beaten
1/4 pound saltines, crushed
1 pound crabmeat
2/3 stick butter
1/2 teaspoon salt
1/2 teaspoon pepper
1 Tablespoon mayonanaise
1 Tablespoon Worcestershire

Taste as you go, in case this is too highly seasoned for your individual taste. You may want to decrease or omit an undesired condiment.

  1. Preheat oven to 350 degrees.
  2. Add milk to well-beaten eggs.
  3. Then add crushed crackers and crabmeat; then the melted butter, mayonnaise, and seasonings.
  4. Bake in buttered casserole dish until golden brown.
  5. Serves four.

Saturday, November 8, 2008

Daisy's Chocolate Bread Pudding and Hard Sauce

Our grandmother's cook Daisy was wonderful. She never used measuring cups, and her fried chicken and apple turnovers were the benchmark to which we mere cooking mortals strive to match. She was legendary in the soul-food kitchen, and she had a wonderful intuition. She was the lady who taught me that horsetails in the sky meant warmer weather would come, and blackbirds flocking meant it would get colder. When she met me as a babe in arms, she told Mom, "When God made that baby, He broke the mold," and no matter how hard my mom tried, I'm her only child.

When she started working with Mom's family, Daisy was 45, but she didn't think anyone would want to hire her, so she told Cha-Cha she was 40. Later, at what we thought was her 60th birthday party, she let the cat out of the bag that she was actually 65!

When Cha-Cha died, Mom and I went to Daisy's house to tell her. Daisy was laid up in a hospital bed, her hair neatly braided, the sheets cleanly folded into hospital corners around her. Sister and the family took such good care of her. Her eyes were closed, and she wasn't very lucid. But when we told her about Cha-Cha's death, she smiled big (with her eyes still closed) and said, "Them n-----s took Miss Charley home." I hadn't cried yet until then, but Daisy's calm, prophetic statement and reassurance made tears just fall out my eyes.

When Daisy died, her sweet family had us sit with them at the funeral. It was a beautiful celebration and an interesting social study: her family was wearing all white, and white Mom and I were wearing all black. But all the women of the congregation, including us, were wearing hats. Mom was overcome with grief and leaned over to my shoulder. A nurse in a starched white uniform came over with smelling salts and a handkerchief.

At the end, the family (including us, we were OK not to go, but Sister wouldn't have it - she considered us family, just like we consider her) got up in a line and paid respects to Daisy on the way out the front door to the congregation singing, "I'll Fly Away." Mom leaned over and kissed the sweet, familiar cheek of the woman who had so much influence on her and who helped raise her. A hush fell over the church: it is a superstition in that society that to touch a dead body is to risk having your soul taken.

Mom and Cha-Cha would follow Daisy around while she cooked in the hopes to get her recipes, so they're a little disjointed. But they're treasures, and I'm happy to share them.

12 slices white loaf bread
1/4 cup milk
2-3 Tablespoons cocoa
2 cups sugar
1 stick (1/2 cup) butter
2 eggs
1 small can (5 ounces) evaporated milk
1 stick butter (for hard sauce)
2-3 cups powdered sugar (for hard sauce)
Scant teaspoon vanilla (for hard sauce)
Bitters to taste (optional - my only personal addition)

  1. Shread bread (with crust: I pull out the food processor to be sure there aren't any lumps) and cover with milk to soak for 15 minutes.
  2. Mix cocoa with 1 cup sugar and add to bread/milk mixture.
  3. Slightly beat 2 eggs and add to chocolate mixture. Mix well.
  4. Add remaining cup of sugar to mixture and mash up with your hands well.
  5. Melt butter and pour enough in pan to "grease every spot in the pan really well."
  6. Pour rest of butter in chocolate mixture.
  7. Add evaporated milk and stir well.
  8. Pour mixture in greased pan.
  9. Place in cold oven and turn to 350 degrees (I like my pudding set a little more, so I check it every 10 minutes for 30-45 minutes).
  10. After 20 minutes, shake the pan to see if it's set.
  11. Cream stick of butter
  12. Add powdered sugar to thick icing consistency
  13. Add scant teaspoon and / or bitters for flavor.

Whenever we finish off a loaf of bread, I save the heels in the freezer. Same for odds & ends in burger or hot dog buns until I have enough bread for this dish. The bitters idea came to me while reading the label on the bottle of Angostura Bitters that we bought in St. Lucia.

Spinach Madeline


Thanksgiving isn't Thanksgiving without this staple in our family. I hear that some families have green bean casserole; I think I could count on one hand the number of times I've even eaten it! So I guess you could say this is our version of the green bean casserole classic.

2 - 16 ounce (32 ounces total) packaged frozen chopped spinach
8 Tablespoons margerine or butter
4 Tablespoons flour
1 cup (8 ounce) evaporated milk
1 cup vegetable liquor
1 teaspoon black pepper
1 1/2 teaspoon celery salt
1 1/2 teaspoon garlic powder
1 teaspoon salt
1 (12 ounce) roll Jalapeno cheese* (or another spicy version of cheese), cut into small pieces
2 teaspoons Worcestershire sauce
Red pepper to taste
1 roll Ritz crackers for topping (optional)
1 stick butter or margerine for topping (optional)


  1. Cook spinach according to directions on package.

  2. Drain and reserve vegetable liquor.

  3. Melt margerine or butter in saucepan over low heat.

  4. Add flour, thinning until blended and smooth, but not brown.

  5. Add onion and cook until soft, but not brown.

  6. Add evaporated milk and liquor slowly, stirring constantly to avoid lumps.

  7. Cook until smooth and thick; continue stirring throughout.

  8. Add seasonings and cheese; stir until melted.

  9. Combine with cooked spinach.

  10. This may be served immediately or put into a casserole and top with buttered bread crumbs.

  11. The flavor is improved if the batter is done and kept in the fridge overnight.

  12. Serves 10-12.
*Mom almost assaulted the guy at Kroger when he said Kraft no longer makes the rolls of Jalapeno cheese. We have neighbors who wrote and called the Kraft company in protest. Now I use pepper jack cheese, but it doesn't come in 12 ounce packages - usually it's either 8 ounce or 16 ounce. I usually buy the 16 ounce and have just a little left over for scrambled eggs later. It depends how much you like spicy: I bet you could even do just regular swiss or mozzarella and optionally add jalapenos on your own.

Even better than buttered bread crumbs, I like to do Mom's version: take one roll of Ritz crackers, mash them up with my hands while they're still in the tube, melt 1 stick of butter or margerine in a bowl, and stir in the Ritz. Makes the best topping ever!

Friday, November 7, 2008

Biscuits

Yet another chapter in the Quest.

This morning I used shortening, one full teaspoon of Tony's, and one full teaspoon of kosher salt. The flavor was pretty damn near perfect.

I've been getting frustrated with the kneading process: to make it not stick to everything, I have to use so much flour as to make the biscuits tough. So this morning I had a wild hair and dumped the dough into my KitchenAid with the dough hook on low for 2 minutes instead of kneading with my hands. I had my doubts, but.....

Even fluffier biscuits!

Then I turned them out onto a lightly floured surface, did a few envelope folds, patted it down, and used a big kitchen knife to cut the dough into rectangles, which I believe are much more intriguing than the plain jane every day circles.
I think this is my favorite yet.

Must remember to use the KitchenAid bowl only next time, as using my red bowl just adds another step and another thing to wash.

Tuesday, November 4, 2008

Biscuits

Made biscuits again tonight. Instead of frozen butter, I used shortening - the other recipe was soooo rich.

And you know what? I like the biscuits with shortening better.

I also used about 1/2 teaspoon of Tony Chachere's and a slight teaspoon of kosher salt. I think next time I'll use a full teaspoon of salt and 1/2 teaspoon of Tony's. For some reason the new biscuits don't seem so salty.

I have noticed that you can tell if they're going to be good biscuits by how they rise - my fluffiest biscuits rise and lean to one side because they're so high they can't support their own weight.

But the tops still don't look like the biscuit tops at my grandmother's or KFC. Hmm.

So here's my new recipe. All of the procedures are still the same, with the addition of the "envelope fold" when kneading.

2 cups flour
1 Tablespoon sugar
1 1/2 teaspoons baking soda
1 teaspoon baking powder
1 teaspoon kosher salt
1/2 teaspoon Tony Chachere's Original Creole Seasoning
1/2 cup shortening, frozen and cut into cubes
1 egg
3/4 cup buttermilk
3 Tablespoons unsalted butter, melted for tops

I think next time, instead of using the 1 1/2 inch round cookie cutter, I might cut the dough into squares and see if that doesn't improve the appearance.

Monday, November 3, 2008

Varsity-esque Chili for Chili Dogs

Well, Mike and I missed going to Atlanta to see Tech beat up on the 'Noles. It would've been a fun game. Since I was going into Varsity-withdrawals, I decided to do some research and see if I could procure the V's recipe for chili dawgs. It turns out that's a very carefully guarded secret. But I found one recipe on Recipezaar (what a peculiar name) that's pretty close.

This is not really chili - more of a topping for the best chili dog you'll ever eat.

4 pounds lean ground beef
1/2 onion, chopped fine
1-2 teaspoons salt
2 Tablespoons ground cumin
6 Tablespoons chili powder
2 cups water(plus more to taste, optional)
1 (1 1/4 ounce) package chili seasoning mix
4 ounces vegetable or olive oil (optional)


  1. Brown ground beef in skillet and drain fat.
  2. Add all ingredients and combine in crockpot, stirring to mix thoroughly.
  3. Cook on high for 2 hours.
  4. Stir well, reduce heat to LOW and continue cooking for 6-8 more hours.
  5. Serves 18-20.

Personal notes:

I had enough ground turkey in the freezer to make this recipe, so to avoid an extra trip to the grocery, that's what I used. To make up for the more lean meat, I upped the onion content to 1 onion and added 1 tablespoon of chili powder because my good friend Linda reminded me that turkey doesn't take on flavor like beef does.

To give it the authentic greasey-spoon texture, I also added 3/4 cup of water and 1 ounce of vegetable oil every hour for 3 hours while I stirred and checked on it.

Goes great with onion rings.

And there are a million ways to cook a hot dog, but here's my new favorite:

  1. In a large stock pot (depending on how many dogs & buns you want to stack up), put enough chicken broth and water to come just under a vegetable steaming basket. (Broccoli? What?)
  2. Put dogs on the basket, cover, and steam for 7-8 minutes.
  3. Using tongs (Watch that steam! It's the most painful burn!), place buns on top of dogs and replace lid on pot for the last 2 minutes or so.
  4. Remove buns, carefully open, place dogs inside, and hand them off to go down the chili/condiment line.

All you need now is an FO.

And for chili storage, use your Pyrex, Ladies. This stuff stains the heck out of Tupperware.


Key Lime Icebox Pie

One of my favorite non-chocolate desserts, this pie is a hybrid of key lime and lemon icebox. I was completely out of eggs, but I had to come up with a dessert for something. Turned out to be pretty good! If you want to make it a true key lime pie, substitute 5 egg yolks for the cream cheese.

1 single recipe regular, graham cracker, or pretzel crust (can make or buy - pretzel is my favorite)
1 can sweetened condensed milk
1 eight ounce package cream cheese
1/2 cup key lime juice (I totally cheat on this one and use Nellie & Joe's bought from the Kroger in Clinton)
1 recipe whipped cream (Cool Whip works too.)


  1. Dump milk and cream cheese in a mixer.
  2. Slowly add lime juice.
  3. Beat as fast as you can without it sloshing out the sides for 2 minutes (about medium, medium-high).
  4. Pour into a pie crust.
  5. Refrigerate long enough to set (at least 3 hours).
  6. Top with whipped cream.

Sunday, November 2, 2008

Whipped Cream

The first time I made this as a married woman, Mike's dad Roy was visiting. He almost got his tongue caught in the hand mixer for licking the beaters before I unplugged it.

8 ounces whipping or heavy cream (1 cup, enough to cover a standard pie very well)
2 Tablespoons sugar, more or less to taste
1 teaspoon vanilla

  1. In a deep bowl (to prevent splashing out) add cream, sugar, and vanilla.
  2. With a wire whisk attachment (for a standing mixer) or whipping beaters for a hand mixer, beat on high until desired consistency has been achieved. I think it's about 1-2 minutes, but it's safer to watch it and stop the beaters every now and then to check.
  3. Be careful: if you beat it too long, you'll end up with great homemade butter.

Chicken Spaghetti

Today my dear friend Betsy's daughter Emily is getting baptized. Happy Baptism Day, Emily!

This is one of Mike's favorite recipes. Sure, it's a "can-can" dinner (you basically just open a bunch of cans), but he likes it, it's relatively easy to prepare, and it's even better the second day around! The black olives, artichokes, and mushrooms can be switched around: if you like black olives, do all olives, or two cans artichokes, one can mushrooms, etc. Also, the frozen three pepper blend can be switched our for mirepoix (onions, peppers, and celery), just bell peppers, or anything you like. And of course you can do any of this stuff fresh - it's just easier for me to raid the pantry once in awhile.

1-2 pounds chicken, cooked and picked into bite-sized pieces
12 ounce package spaghetti
2-3 ounces olive oil
1 bag frozen three pepper blend (I get mine from the freezer section of Kroger)
8 ounces Velveeta, cut into cubes
1 can Ro-tel
1 can black olives, chopped (I like to use the Vidalia Chop Wizard)
1 can artichokes hearts, quartered
1 can mushrooms
2 cups shredded cheese
Paprika to taste

  1. If you're going to oven-cook it now (instead of freezing it for later), preheat oven to 375 degrees.
  2. In a large sauce pan, drop in an ounce of olive oil and the three pepper blend. Saute the peppers for 5-7 minutes, stirring occasionally.
  3. Start the water to boil for the spaghetti, adding the other ounce of olive oil (to keep the pasta from sticking) and some salt to taste.
  4. While the peppers are sauteeing and the spaghetti is boiling, dump the chicken, olives, artichokes, and mushrooms in a big-ass bowl.
  5. Once the peppers are just flexible (thawed and crunchy/soggy to your taste. Mike likes 'em limp. I like 'em crunchy.), add the Velveeta and Ro-tel to the sauce pan, stirring occasionally until the cheese has melted.
  6. Drain the pasta and add to the big-ass bowl.
  7. Carefully add the hot cheese and pepper sauce to the big-ass bowl.
  8. Let it sit for a couple of minutes: the room-temperature canned items will help to cool the hotter stuff.
  9. Stir it all up and separate it into greased Pyrex dishes. Makes about three 8x8 or two 9x13.
  10. Top with cheese and sprinkle with paprika.
  11. Cook at 375 for 15-20 minutes, or until casserole starts to bubble.
  12. Serves 6-10.

I usually keep one in the fridge, and freeze or give the others away. You can add as much more chicken, pasta, or cans for filler if you're feeding more people, but be careful with the Ro-tel. I love spicy stuff, but I tend to get it too hot for some.

Saturday, November 1, 2008

Chicken and Broth for Pot Pie, Spaghetti, Lasagna, Poppyseed Chicken.... whatever you need cooked chicken for


A CHICKEN IS LIKE A MAN. THE FASTER YOU COOK IT, THE TOUGHER IT IS. LET IT SIMMER, AND IT'S PUTTY IN YOUR HANDS.

Basically, take some raw chicken, put it in a pot with your favorite seasonings (celery salt, onion powder, garlic, paprika, pepper, oregano, thyme, rosemary, whatever), boil it for 30 minutes to an hour, let it cool in the water as long as you want to (but less than 3 hours to prevent bacteria growth), and pick it free of bones, fat, skin, and cartiledge. Then use it in a recipe, refrigerate it, or freeze it.
The liquid that's left after you boil a chicken is homemade chicken broth. Drain it, refrigerate or freeze it, and use it in other recipes.

Hmm. The more I typed up there, the more complicated it seems. But really, you can use any part of chicken (except neck and guts) and any seasonings you like. Here are a couple of examples:

For a dish I'm going to serve company or send as a gift I'll use:
1-4 pounds boneless, skinless chicken breast (depending on how much I need for the recipe)
1 Tablespoon salt
1 Tablespoon pepper
1 Tablespoon minced garlic in oil (I keep this store-bought stuff in a jar in the fridge. Don't tell anybody.)
1 Tablespoon celery or onion powder

  1. Put the chicken and spices in a pot.
  2. Cover with about 2 inches of water.
  3. Set it to boil. I let it boil for about an hour.
  4. Then turn off the heat and let it sit in the water for about an hour to absorb the flavors of the spices.
  5. Rinse it off, pick off what little fat there is, and shred the meat into smaller pieces.

Or if I'm doing a chicken casserole for Tuesday night, I might go the more economical route and just boil a whole chicken to include both light and dark meat. Mom turns her nose up at the idea of buying, butchering, or dealing with a whole chicken. I figure it's a money saver, and I'm glad to be familar with what I'm eating.
  1. Be sure to fully thaw the whole chicken either in the refrigerator (slower thaw, more tender meat) or in a sink of moving water (faster thaw, slightly less tender meat).
  2. The gross part: reach into the chicken and be sure to get out all the guts and the neck. If left in, the guts will turn the water brown and might mess with your flavor.
  3. Rinse off the chicken, inside and outside, and repeat steps 1-5 above.
  4. As for picking the chicken, don't be shy. It's dead: it doesn't care. Just jump in there and start pulling off anything that looks like meat.
  5. There are basically 8 parts of a chicken (2 sets of quarters): 2 breasts (white meat), 2 wings (white meat - what you'd get at Buffalo Wild Wings), 2 drumsticks (dark meat), and 2 thighs (dark meat)
  6. Put the meat parts in a clean bowl. Bones and fat go in the trash. You'll be suprised how much meat you can pick off a whole chicken.

Yes, boiled chicken is greasy. Take off your rings before you pick it. But it's a FABULOUS skin moistureizer.

Pie Crust

Up until a few months ago, I scoffed at the crazy people who would do a pie crust from scratch. What? Why would you DO that when you can go BUY one at the Kroger just as easy? That's just crazy.

And then I found this recipe in the September 2008 Better Homes and Gardens, and it all made sense. Yet another recipe I follow to the letter.

Ingredients:
1 1/4 cups all-purpose flour
1/4 teaspoon salt
1/3 cup shortening
Cold water


  1. In medium bowl, stir together all-purpose flour and salt.
  2. Using a pastry blender, cut in shortening until pieces are pea-size (or smaller).
  3. Sprinkle 1 Tablespoon cold water over part of the flour mixture; gently toss with a fork to mix.
  4. Push moistened pastry to side of bowl.
  5. Repeat moistening four mixture, using 1 Tablespoon of water at a time, until all of the four mixture is moistened.
  6. Form dough into a ball.
  7. On a lightly floured surface, use your hands to slightly flatten pastry.
  8. Roll pastry from center to edges into a circle about 12 inches in diameter, lightly dusting with flour as needed.
  9. To lie pie in plate, wrap pastry around rolling pin. Unroll into a 9-inch pie plate or pan. Ease into pie plate without stretching the dough. Trim edges of crust to 1/2 inch beyond pie plate. Flute edge as desired.

Notes from personal experience:

If you're going to use this crust for a dessert pie, add about 1/4-1/3 cup powdered sugar to each crust you're making (1/2-2/3 cup for a double crust recipe), according to how sweet you want the crust to be. It's basically a short bread recipe.

Cook this pie crust just like you would a storebought one. If you're pre-cooking the crust for a pudding- or cream-filled pie, don't forget to prick the crust with a fork to vent. And if you use a double-crust recipe, be sure to cut holes in the top to vent.

  1. For a single-crust cold dessert pie, bake at 450 degrees covered in a double-layer of tin foil for 8 minutes, then take foil off and bake for 4-6 more minutes, until golden brown.
  2. For a double-crust or other recipe, follow the recipe instructions.

You can double this recipe in the same bowl and just take out what you need, when you need it. It's homemade, so it's not supposed to look perfect.

Latticing a pie is a lot easier than you think it is. Pie dough is strong, and if it breaks, you can hide the break under a lattice. Once you have the bottom crust and filling in the pie and the top crust rolled out to a 12 inch circle, take a knife and slice the crust in about 1 - 1 1/2 inch wide strips. Work from one end of the crust with short strips to the other, with short strips.

  1. Take your first piece, and lay it along one side of the pie.
  2. Take up the piece next to it, slightly longer, and lay it perpindicularly (sp? at a 90 degree angle) with the corner on top of the first piece.
  3. Take up the third, slightly longer, piece. Lay it parallel to the first piece and pick up the second piece to allow it to go underneath.
  4. And so on and so forth.
  5. You kind of have to hold your mouth just right to do it the first time, but it gets easier with practice.
  6. Another benefit to a latticed pie is if you forget liquid (like I did with the chicken broth on the chicken pot pie), you can just pour it into the lattice holes.

I put all the pictures at the bottom so it wouldn't be a hassle to follow the recipe instructions:

2. Using a pastry blender or fork, mix flour, salt, optional sugar, and shortening until pea sized or smaller.

3. Sprinkle water and toss, then push to the side of the bowl.
Roll out to about 12-inch diameter.

Wrap pastry around rolling pin.

And transfer to pie plate.

I'm still not great at edging - I bet you can do better than I can.

Prick bottom with a fork.

Voila.

Chicken Pot Pie

Here's a brand new one, completely off the top of my head. Mom didn't think she'd like it because of the canned vegetables, but the other homemade goodness made up for them.


Ingredients:
1 recipe double pie crust (You can buy or make.)
1/2 onion, finely chopped
1/4-1/3 stick butter
1 can cream of celery soup (or cream of mushroom)
1/2 cup chicken broth
1 1/2 - 2 pounds chicken, boiled and shredded (You can buy or make.)
1 can Veg-All, drained
salt and pepper to taste


  1. Preheat the oven to 375 degrees.

  2. Line a standard pie plate with the bottom half of the pie crust.

  3. In a small sauce pan, melt the butter and saute the onion until soft.

  4. In a large bowl, mix together the soup and chicken broth.

  5. Mix in to the soup and broth the chicken, Veg-All, and salt and pepper.

  6. Dump filling into bottom half of pie crust.

  7. Pour sauteed onion on top.

  8. Cover with top half of pie crust, either vented or latticed.

  9. Bake for 20 minutes at 375, then bump up the temperature to 425 degrees for 15-20 additional minutes to brown crust and ensure filling is bubbly. If edges start to brown, use tin foil to cover and keep it from burning.

The one I made today fell all apart when I tried to put slices on the plate. But I guess that's part of the fun. It holds its shape once it has cooled down.

It's not as creamy and gooey as Marie Calendar's pies, but I didn't want that stuff in my pie anyway: I wanted to emphasize the chicken and crust. But I bet if you added another can of cream of (insert your favorite here) soup and some more broth, it would be much more, ah, soupy.

Divinity

Another candy recipe that depends on the humidity. I try not to make this one if it's 60% or more outside. It's by Ann Gilbert, from one of my First Methodist of Canton cookbooks.

Ingredients:
2 1/2 cups sugar
1/2 cup Karo, light
1/2 cup water
2 egg whites
2 Tablespoons sugar
1 teaspoon vanilla
1-2 cups walnuts or pecans (optional)

  1. Combine sugar, Karo, and water in saucepan.
  2. Cook to firm ball stage (250 degrees).
  3. Beat egg whites until stiff (in a mechanical mixer with the whisk attachment).
  4. Add 2 tablespoons sugar (to eggwhites) and beat for about 10 to 15 seconds.
  5. Pour syrup into egg white slowly while beating.
  6. Continue beating until candy begins to lose its gloss and will hold its shape (when you turn off the mixer).
  7. Add vanilla (with the mixer) and nuts (stir nuts in with spatula - don't use mixer so you won't release nut oils and screw the whole thing up).
  8. Drop by teaspoon onto waxed paper (I use two spoons: one to get it out of the bowl, and one to scrape the contents of the first spoon onto the wax paper).
  9. If candy starts getting too hard before you finish, stir in a few drops of water.

A few notes from my own experience:

This is one recipe I follow TO THE LETTER.

This recipe almost requires a mechanical mixer. It doesn't have to be a fancy-pants KitchenAid, but it should be one that can operate without your hands doing any work in the mixing process. Reason being, on step 5, pour syrup slowly, it means SLOWLY, as in try to get the most thin ribbon of syrup coming from the pot into the mixer as possible, while the mixer's going high speed. It should take a long time, and it helps your muscles to prop the pot against the bowl while pouring.

The object of this game is to infuse miniscule bubbles of air into the egg whites and syrup: stiffly beaten egg whites + syrup + air = good divinity.

Seven Minute Icing is a variation of this - it's basically divinity - but I haven't tried it yet. Right now I'm not a master of divinity, and until then, if I'm going to all this trouble, it's gonna produce a candy everybody oohs and ahhs over, not icing that nobody notices.

I'll come play in your kitchen, too!

So yesterday's posts were really long and detailed. I'm just trying to keep all my research in one place. If you want to try one, but a 4 page long recipe for biscuits seems intimidating, I'm always more than happy to come play at your house, or you can come to my kitchen, and we'll cook together.

I'm not saying I'll teach you anything. But we'll have a good time either way.

Friday, October 31, 2008

Fudge

When I met Alton Brown, I was so nervous that I blurted out, "My name is Fran Peacock, and I can make fudge." His response?

"That's the sexiest thing a woman has ever said to me."

*swoon*

This is probably one of the most difficult recipes I've ever done. It was my grandmother's. I'm not kidding when I say it works best at 45% humidity and below. 30% humidity is ideal, so when I make it, I feel fall and Christmas coming. I have a mini weather station in the kitchen that tells me when to make fudge, so if your fudge doesn't work, blame it on atmospheric conditions.

There are three types of fudge: spoon fudge usually occurs when the candy isn't beaten long enough and never sets up. Sugared, crunchy fudge occurs when the fudge is messed with during the cooling period and sets up too much (the sugar starts to bond, forming crystals). And perfect fudge, which is so good you'll find yourself eating half the pan.

Ingredients:
5-6 Tablespoons cocoa
3 cups sugar
3 Tablespoons Karo light corn syrup
pinch of salt
1 1/4 cup (9 ounces) evaporated milk
2/3 stick butter
1 1/2 teaspoon vanilla
1-2 cups pecans (optional)

  1. Butter very well an 8x12 or 9x13 Pyrex casserole dish.
  2. In a 2 qt saucepan, mix cocoa and sugar.
  3. Add Karo, salt, and milk.
  4. Boil to soft ball, and keep it at soft ball for 2-3 minutes (240 degrees by candy thermometer, or when a pinch makes a line - see below).
  5. Pour into a mixer bowl over butter.
  6. Allow to cool until you can hold your hands firmly around the base of the bowl without cursing. WHILE COOLING, DO NOT STIR. This leads to sugared fudge.
  7. Add vanilla.
  8. Hook bowl up to mixer and beat the hell out of it at high speed. Don't do this during a football game: be prepared to stand over the mixer for 15-30 minutes, watching it. If you hear a slapping sound when the paddle makes a round, you still have a while to go.
  9. Beat until the fudge loses its gloss and just begins to hold its shape when you stop the mixer.
  10. Unhook bowl from mixer and quickly stir in the pecans with a spatula - the fudge should be thickening quickly at this point and somewhat hard to stir around.
  11. Dump the whole mess into the Pyrex dish and lick the bowl.

"When a pinch makes a line," is how my grandmother and mom did it. While the stuff is boiling, take a teaspoon and get some out of the pot. Drop it in an awaiting bowl of cool tap water and watch what happens. Then pick it up out of the water - if you can shape the chocolate in a line along your finger, you're at the right temperature. Hard ball forms a hard ball. Soft crack candy will crack somewhat when it hits the water but still be flexible, and hard crack is so hot, it cracks to rigid pieces. I think. That's the old school way to do it, and I've only ever seen it done. I'm more of a thermometer girl, myself.

Biscuits

The #*@&! cat came back around 4:30 this morning. Mike's still sleeping. I should be running, but the wierd sleep schedule is catching up to me. So I figured I'd give some details on the recipes from yesterday. I'm going to do it in 4 separate posts, so I'll have the name of what I'm doing in the title for easier reference.

For me, good, fluffy biscuits are like the Southern Holy Grail. I can't believe I took them so for granted in my grandmother's house. And it irks me that the ones at Kentucky Fried Chicken are so damn good, yet have never touched human hands. I've even kept a biscuit journal with notes on exactly what I've done. So goes the search for the perfect biscuit recipe.

Here's the real recipe that I'm currently working with, per Robert St. John and Wyat Waters' Southern Seasons: Contemporary Regional Cuisine, page 33 "Tasso and Biscuits with Blackberry Preserves:

2 cups flour
1 Tablespoon sugar
1 1/2 teaspoons baking soda
1 teaspoon baking powder
1 1/2 teaspoons kosher salt
1/2 teaspoon Poultry Seasoning (recipe page 111)
1/2 cup butter, cut into small cubes and frozen
1 egg
3/4 cup buttermilk
3 Tablespoons unsalted butter, melted
1/2 cup blackberry preserves
1/4 pound tasso ham, shaved very thin

Preheat oven to 375 degrees.

In a food processor, combine flour, sugar, baking soda, baking powder, salt, and poultry seasoning; pulse to mix. Add the frozen butter, pulsing until mixture resembles coarse bread crumbs. Transfer mixture to a large mixing bowl and make a well in the center. In a small bowl, whisk together the egg and buttermilk. Pour buttermilk mixture into the well and gently blend together the dough, being careful not to overmix.

Allow the dough to set for 10 minutes and then turn dough onto a floured surface. Gently knead dough for 1-2 minutes. Roll out to 3/4 inch thickness. Cut 1 1/2 inch circles form the dough and place them on an ungreased baking sheet. Brush the tops wiht melted butter.

Bake 12-15 minutes.

Cut biscuits in half lengthwise. Spread 1 teaspoon of blackberry preserves on the bottom half of the biscuit. Add 2 thinly shaved pieces of tasso and replace the top half of the biscuit. Serve warm.

Yield: 6-8 servings"

OK, so here's how I do it, all basically the same except:

As for the ingredients, I leave out the Poultry Seasoning. This is for a savory biscuit, and I don't want savory in the morning when I'm having my biscuits and coffee. 1 1/2 teaspoons of kosher salt is WAY TOO MUCH. I keep it at 3/4 - 1 teaspoon, with 1 teaspoon meaning every now and then you still get a bite of SALT.

Buttermilk, unfortunately, cannot be replaced with normal 2%. I've tried. It produces a biscuit, sure, but you could chip a tooth on it. The good news is you can get buttermilk in pint size (2 cups per bottle), it keeps longer than regular milk, and you can use some to marinate that chicken you're gonna fix with the biscuits or to make a chocolate buttermilk cake I'll hopefully post one day.

Tasso? Do you really think the Kroger in Clinton, Mississippi, carries tasso?? (Cajun-spiced ham. I had to look it up.) I just use this as a basic biscuit recipe and eat them with whatever I want.

I think the ingredients could easily read: 1/2 cup frozen butter (that's one stick), cut into 8 pieces (the above list is saying that you have to cut the butter in pieces before you freeze it. That's silly. I keep butter in the freezer anyway.) The butter must be frozen because that's what makes biscuits fluffy: the steam from the thawing out butter creates millions of mini-pockets of air within the bread. It's the same concept as pate a choux ("pat-a-shoes:" the basic bread part of an eclair) but pate a choux hopefully gets one big steam pocket for cream inside.

When kneading, use only as much flour as you need to keep the dough pretty much not sticking to your board and rolling pin. The dough should be deceptively moist, and it's ok for bits to stick here and there: too much flour incorporates into the dough and makes a tough biscuit.

To get a higher biscuit, spread the dough in a rectangle. Fold it into thirds like a letter, one third to the middle, then the other third to the middle. Then spread it out again and do the same thing. This is the same concept as puff pastry, only puff pastry has thousands of microscopically thin layers, and even Alton Brown lets a machine take care of it.

So there's my experience so far with biscuits. Any suggestions, questions, comments, or other hoo-hah can always be sent in comments or emails! And if you know me well enough to have my cell phone number, you're more than welcome to call.
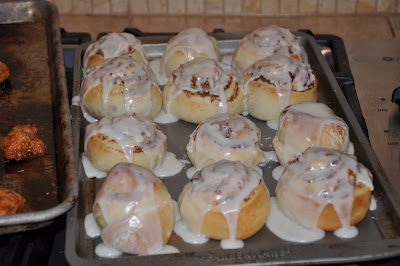
Thursday, October 30, 2008

Biscuits, Fudge, Divinity, and Chicken Spaghetti

Those were on today's docket in the kitchen.

The biscuits were OK, but not as good in texture as the first time I made them from the Wyatt Waters cookbook Mike gave me for Christmas last year, page 33. I think I put in too much flour during the kneading process. But they were nice and high: I attribute that to the letter-folds I did during kneading. They're also still very rich, possibly from the butter or the kosher salt. One teaspoon still seems like a lot.

The fudge was good, not as good as what my friend Linda made for Christmas last year, but good nonetheless. I got distracted, and it started to set up in the bowl, so it didn't get as many nuts mixed into it. But the good news is that it's creamy, yet it set up enough in the Pyrex dish that it never touched the sides. It was also the first time for me to use the Calphalon Contemporary on fudge, and I think it went very well. There was a bad burnt smell right after I poured it up on the butter after boiling to soft ball, but it didn't affect the final product at all. I think maybe something scorched in the pan.

The divinity was a learning process. I still can't do it as well as the first time around. I decided to put pecans in there because, well, I had pecans instead of walnuts. I had the candy beaten to a fair-thee-well; it had lost its sheen and was holding its shape. But I added the nuts and kept on beating in the mixer, and the sheen instantly returned, as did severe and complete loss of shape. As in, the final products are blobs instead of doots. I realized too late that beating the pecans in with the mechanical whisk released the oils of the nut, thereby messing up the whole structure of the candy. Damnit.

The chicken spaghetti was normal in taste (I've finally managed to remember the right amounts of ingredients! 8 ounces velveeta [forgive me, Great-Grandmother. I have sinned.], 1 can quartered artichoke hearts, 1 can black olives, 1 can mushrooms, 1 can rotel, 1 bag frozen three pepper and onion blend, a little olive oil, and a mess of chicken and noodles). I made it with farfalle instead of regular pasta. The last time I used bowties was in a crawfish nita I made about this time last year, and eating the pasta just reminds me how good that nita was. I need to (ha, no pun intended!) pull that recipe out again.

Wednesday, October 29, 2008

Beer Battered, Fried Onion Rings

My dear husband's 8-year-old big mean inside cat ran away yesterday. Mike went to bed at 10 AM, and when he woke up at 3 PM, the front door was wide open, and Kearney was gone. We have seen neither hide nor hair of him since. Mike's pretty upset about it.

Adding insult to injury, work put him on call this weekend, even though he has asked since he started in July to get this weekend off so we could go to the GA Tech football game in Atlanta. Since our trip is in jeopardy, and I'm willing to move heaven and earth to put a smile on Mike's face, I offered to make chili dogs and onion rings like we would have had at the Varsity while we get irresponsibly drunk at home here in Clinton.

So now I have to figure out onion rings.

4 onions
1 cup flour
1 cup beer
a pinch of salt
a pinch of pepper
1/4 to 1/2 cup Louisiana hot sauce (optional)
1 quart of vegetable oil for frying

1. Set the oil to heat at 350 degrees.
2. Mix flour, beer, salt, pepper, and optional hot sauce (doesn't make them spicy - just adds more flavor) in a medium bowl.
3. Peel the onion, slice, and separate into rings.
4. Dredge the onion in the beer batter and drop lowly and slowly into hot oil
5. Fry for about 3-4 minutes, then turn over to fry for about the same time, until golden brown.
6. Put fried rings on a paper towel, shake with salt and pepper to taste.

I had a plate of these for supper tonight. That's it. Just one big onion beer battered and fried. With some ketchup. And the extra 4 ounces of beer. Again, never trust a skinny cook. Mental note to run 2 miles tomorrow morning, as it's too late to get my endorphins going and have any hope for sleep without Mike in the house.


Tuesday, October 28, 2008

Huh. look at that. Fran's started a blog.

Grief can do wierd things to a person. I can't define it. Everybody says, "you've been going through so much lately," "we'll get through this together," "I know what you're going through..." Am I really in a state of grief? Do I even have the right to grieve? It's something I don't understand.

Maybe it's just a matter of feelings during a day. Getting out of yourself. Going to help somebody, try new things, keep living life. And then there's the twinge of guilt for letting life keep on going. But when does it end? Wouldn't it be nice if the grief fairy came over to let you know you're out of "time out?" After the first volley of not wanting to get up for two weeks, I realized Mike and I had to eat. So I dragged myself back into the kitchen.

And I made eclairs. Apparently a challenge is good. Since then I've mastered fried chicken, and I've even made an edible batch of biscuits.

I was in a local housewares shop this morning, and I had two ladies older than my mom ask me stuff that seemed second nature to me. Like, will this food processor chop nuts (no, that one will make nut paste. You want the nut chopper from Williams-Sonoma.) and will this pan work with egg-dipped fish (yes, as long as you use a silicone spatula that's heat resisitant up to 500 degrees or a nylon one that's heat resisitant up to 400. Don't use cooking spray, don't use a steel scrubber, only use olive oil sparingly.) Wonder if that means I have a knack?

Also, having inherited my grandmother's inability to follow a recipe, I'm always making stuff I'd like to try again, but completely omitting the "write it down" part. So since I type faster than I write, I figured this would be a good place to make notes.

My great-grandmother Leila was widowed at my age: 28. She had two children and one on the way. Having received a college education, she knew she had to provide the same to her two boys and a girl (my grandmother). With everyone around her telling her she was a fool, Leila sold the family home in Lineville, Alabama, and bought three houses on Tumor Street in Auburn. At the time, the college there was called the Alabama Polytechnical Institute. Leila rented out two of the houses, lived in one, and ran a boarding house in that one in which she fed 2 shifts of 75 boys breakfast, lunch, and dinner 7 days a week. I have the bell that she used to call them up from the basement where they would wait and the box she used for recipes. My grandparents met there: my grandfather worked for Leila while he put himself through veterinary school. My grandmother and two great uncles went on to achieve multiple degrees at Auburn. My grandmother was a home ec major, while Forest and Robert were both engineers, like their dad was. I don't think it's coincidence that I married an engineer myself.

So here I go. Don't tell Mike. He thinks blogs are by people who are full of themselves. I think I'll just use this one as a cooking journal and maybe a little bit of therapy.

Never trust a skinny cook.


Made by Lena