 To find more beauty in everyday life.
Monday, January 12, 2009
Grilled Beef Tenderloin
I found beef tenderloin on sale at the Kroger last week. We ate well this weekend.

Isi Thermo Whip
This past Friday I had a little extra time between appointments, and for some reason the Williams-Sonoma up at the Renaissance was calling my name. Turns out they were having a big-ass 75% off sale - they had just finished the second markdown to get merchandise out of the store, and I was about to benefit from it immensely!
They did have some slate le Creuset on sale, but I couldn't bring myself to cough up that kind of dough. If the pot is still there this afternoon, I might have to buy it for Mike to give me for my birthday. But I digress.
They DID have several Isi Thermo Whips up for grabs at 75% off! I've always been fascinated by this kind of gadget, but I wasn't about to part with that much money. What is an Isi Thermo Whip, you ask? It's only the coolest thing in the kitchen ever!
I'm not sure of all the inner workings; let's just say cartridges are involved. For whipped cream, example, you open it up, pour in cream and whatever other flavorings you desire, close it, use the cartridge holder to insert the cartridge until it hisses, shake it, remove the cartridge and throw it away, put the dust cap over the cartridge holder, screw on your preference of nozzle, and voila! You truly have homemade Reddi Whip. Without the preservatives or energy spent in whipping the hell out of the cream. You can use it any way you might use whipped cream.
And it's awesome for mousses. I have a recipe for chocolate mousse I'm going to try next (the downer of the Thermo Whip is that you have to use up all of the stuff inside before you can open it because all of the contents stay under pressure until used up.), then I figure if I can do chocolate mousse, I bet my butt I can do a key lime too. Or maybe a raspberry. The sky's the limit.
I guess the real beauty of this thingy is that truly, all you do is pour stuff in, play with a couple of doohickeys, and it's done. No fuss, no muss. Very high reward for very little effort.
Photo courtesy http://www.easywhip.com/isi-thermo-whipped-cream-dispenser.html
Monday, December 15, 2008
Pelotzels
Pronounced "peh-LO-tzles." These babies are divine. My friend Judy emailed the recipe to me - apparently they're popular at Bunco. I almost made myself sick on them on many an occasion.
pecan halves
Rolos
waffle pretzles (they're about 1 1/2 inch square)
- Preheat oven to 350 degrees.
- Cover a cookie sheet with foil.
- Spread preztles out on cookie sheet.
- Top pretzles with Rolos.
- Cook Rolo-covered pretzles for 4 minutes - THAT'S IT - just enough to barely melt and soften up the Rolos.
- Carefully top each Rolo with one pecan half. Smush it down so it looks fancy-pants.
- It takes a while for the chocolate to re-solidify. Putting it in the fridge may hurry up the process.
Thursday, December 11, 2008
Cinnamon Rolls
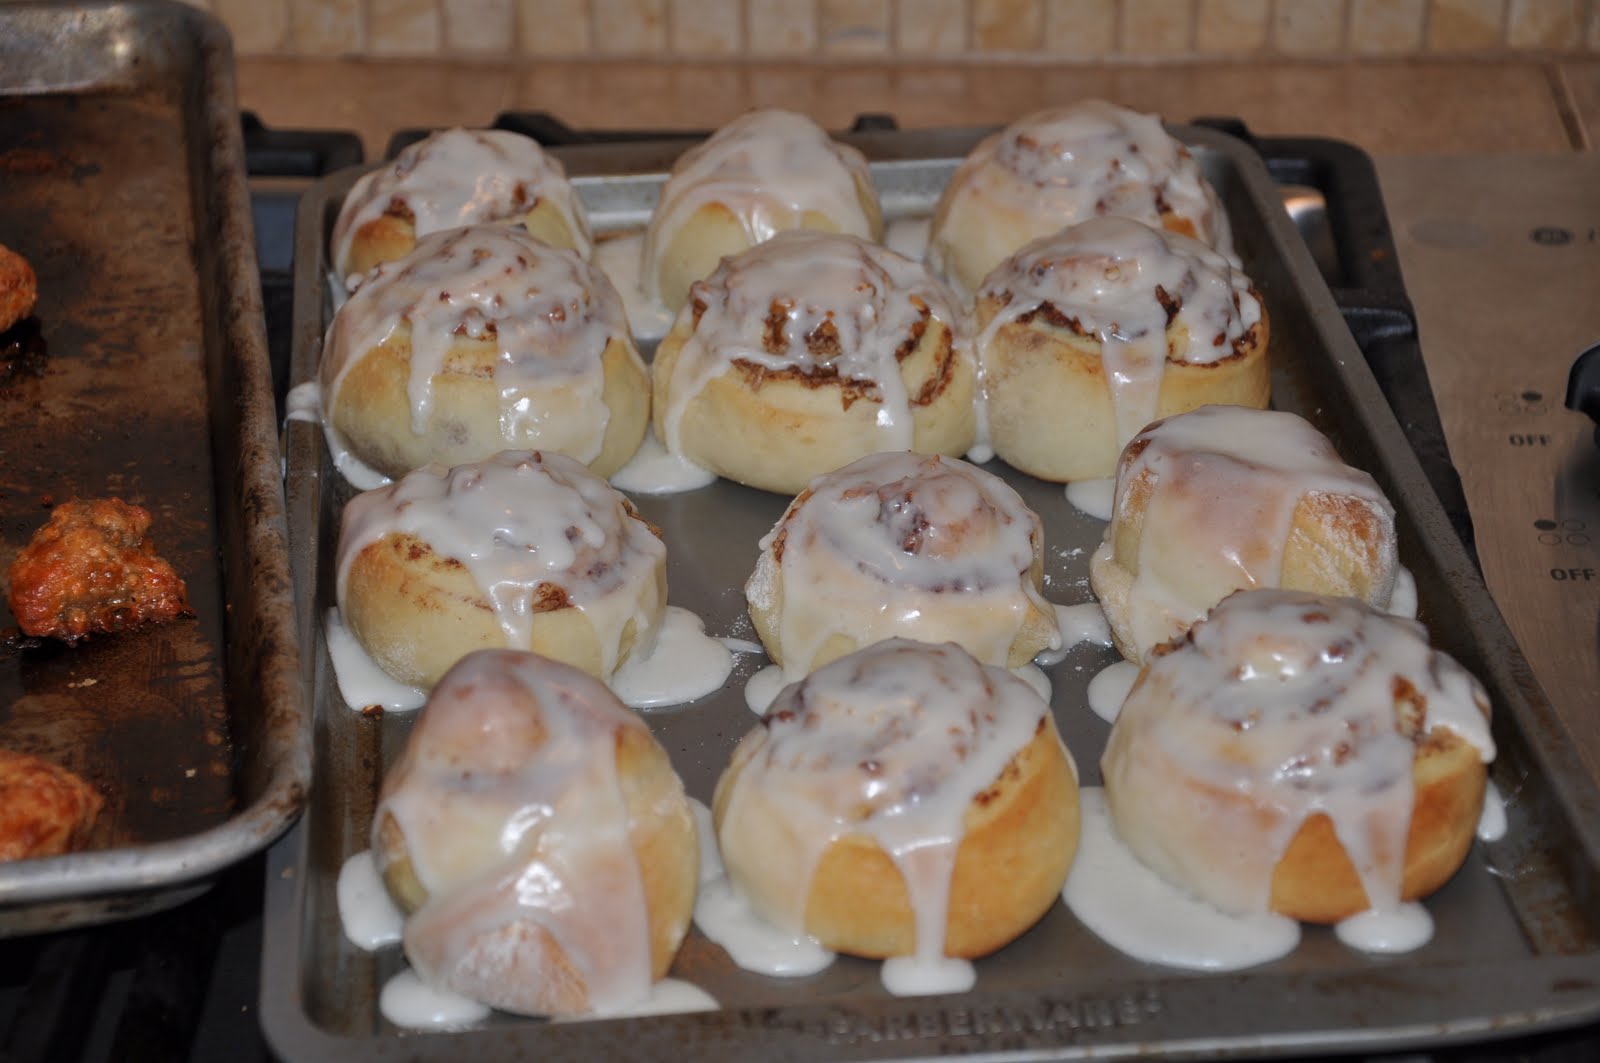
Again, mandatory for a snowy morning.
1 recipe yeast rolls
1/2 stick butter
2 Tablespons sugar
2 Tablespoons ground cinnamon
1/2-3/4 cup chopped pecans (optional)
1 Tablespoon butter
2 Tablespoons milk
1 teaspoon vanilla
1-2 cups powdered sugar, depending on your taste of consistency
- Preheat oven to 375 degrees.
- Melt 1/2 stick butter.
- Mix sugar and cinnamon together.
- Roll out half of dough to almost 1/4 to 1/8 inch thick. Make a rough rectangle.
- Pour 1/2 of the butter butter on dough and smooth all over.
- Sprinkle 1/2 of the cinnamon and sugar mixture over butter.
- Sprinkle 1/2 of the nuts over cinnamon and sugar.
- Roll up dough lengthwise and seal edge with water.
- Cut into 1-1 and 1/2 inch thickness.
- Turn rolls up and set on ungreased cookie sheet, about 1-2 inches apart.
- Repeat with remainder of dough, butter, cinnamon sugar, and nuts.
- Bake for 10-15 minutes, or until brown.
For icing:
- Melt 1 Tablespoon butter in a deep microwave safe bowl (I use a 2 cup measuring cup).
- Stir in 2 Tablespoons milk and 1 tesapoon vanilla.
- Stir in powdered sugar until desired consistency is achieved. Thinner makes a glaze, thicker makes an icing.
Makes about 2 dozen.
Cha-Cha's Yeast Rolls
Every time it snows, I have to make cinnamon rolls. It's tradition. Even if it hints at snowing, the cinnamon rolls make an appearance. Snow, Christmas, overnight company, and sometimes Thanksgiving are almost mandatory for homemade cinnamon rolls.
Yes, you could say making cinnamon rolls is my version of doing the snow dance. (Beats doing the rain dance naked. That's just cold.)
But to make cinnamon rolls, you need a basic starter of yeast rolls.
This is by far my favorite yeast roll recipe. Yeah, it's old school, so it's a little more wiley than other yeast rolls, but once you get the hang of it, they come out tasting damn good every time. Even if you don't have the hang of it, they're pretty good. I remember when my grandmother, Charlie Faye Nixon Flynn, also known as Cha-Cha would make these.
One of the tricks is not to knead it too much: when cutting out the dough, you need to try to get as many round circles in a rolled-out flat of dough as possible. Which means start on one side and work your way to the other, cutting out rolls as you go. I would DELIGHT in cutting out the first roll out of the direct middle of the dough flat, meaning that it would have to be reworked more often, thus slightly more tough and certainly less efficient.
I've grown up to have the same perverse delight in driving in the exit or walking in the out door too.
These are great rolls, but they also make awesome little sandwiches for a buffet or parties or just leftover turkey/roast/ham/whatever in front of the TV.
2 cups milk (or one cup milk, one cup buttermilk)
1 rounded teaspoon salt
1/2 cup sugar
1/2 cup shortening
2 packages yeast, dissolved in 1/4 cup cool water
5 scant cups flour (just shake the measuring cup side to side to even out the top)
1 teaspoon baking powder
1/2 teaspoon baking soda
butter
1. Heat shortening, milk, salt, and sugar until it melts.
2. Pour into a large stainless steel bowl and let it cool 'till very warm, but not hot. If you can hold your hands against the side without thinking "ouch" or cussing, it's probably ready.
3. Add yeast to water; let it soften, and stir into very warm milk mixture.
4. Stir in well 3 cups flour and cover - this makes a big mess.
5. Put cloth over mess and let it rise until double.
6. Work down with spoon or hands.
7. Add remaining 2 cups flour (give or take 1/2 cup), baking powder, and soda and mix well.
8. Cover tightly; will keep in refrigerator for 7 days.
9. Roll out dough as needed, cut in rounds, fold round in half, top with melted butter, and bake until brown (about 10 minutes).
Sunday, December 7, 2008
Chiffon Pumpkin Pie
How to have the perfect, non-stress Thanksgiving? Have everybody else cook for you. It wasn't really planned: Mom had a friend make the dressing, then she made the spinach madeline, one of my dear clients gave us the best smoked turkey I've ever put in my mouth, and Judy made the pecan pie. All that was left for me was this holiday staple.
It's a very old recipe - probably one of my oldest. My grandmother says it was my grandfather's grandmother's recipe... So that was my great-great grandmother. And to think - that was before electric mixers, so the eggs were beaten with a hand-crank egg beater! I know people who don't even know what those are.
The first time Mom ever went to my Dad's parents' house was for Thanksgiving. My grandmother held up the whole meal because she couldn't find this recipe. At first, Mom thought Grandmama was crazy.... Then she tried it and understood. It's a light, fluffy pie, so you can still eat it after a huge meal.
This recipe makes 2 pies. Don't worry - they won't go to waste.
2 baked pie shells, completely cooled
3 egg yolks, slightly beaten
1 cup sugar, split into half-cups
1 1/2 cups canned pumpkin (1 - 15 or 16 ounce can. Be sure to get just pumpkin, not pumpkin pie filling.)
1/2 cup milk
1/2 teaspoon cinnamon
1/2 teaspoon salt
1/2 teaspoon ginger
1/2 teaspoon nutmeg
1 Tablespoon gelatin (1 envelope Knox)
3 egg whites, stiffly beaten
1 pint Cool Whip or whipped cream
- Combine egg yolks, 1/2 cup sugar, pumpkin, milk and spices in a saucepan.
- Cook until thick. BE CAREFUL to have fully combined ingredients so the eggs don't scramble. This shouldn't take long - about 5 minutes to get it hot through.
- Soak gelatin in water for 5 minutes.
- Add pumpkin mixture, mix well, and set aside to let it cool.
- Once at room temperature, add rest of sugar and gently fold in stiffly beaten egg whites.
- Pour in pie shells and top with whipped cream or Cool Whip.
Subscribe to:
Posts (Atom)


